Draft:Shiren 1 SFC:Final Puzzle: Difference between revisions
Jump to navigation
Jump to search
No edit summary |
m (Text replacement - "↵↵==In Other Languages" to " ==In Other Languages") |
||
| (34 intermediate revisions by 4 users not shown) | |||
| Line 1: | Line 1: | ||
{{Shiren 1 SFC | {{Shiren 1 SFC Dungeon Infobox | ||
| | | enname = Fay's Final Puzzle | ||
| | | jpname = フェイの最終問題 | ||
| romaji = | | romaji = | ||
| image = Shiren 1 SFC - Fay's Puzzle House Interior.png | | image = Shiren 1 SFC - Fay's Puzzle House Interior.png | ||
| | | description = Final Dungeon | ||
| description_ja = | | description_ja = | ||
| entrance = {{Shiren1SFC| | | entrance = {{Shiren1SFC|Canyon Hamlet}} | ||
| goal floor = 99 | | goal floor = 99 | ||
| total floors = 99 | | total floors = 99 | ||
| Line 23: | Line 22: | ||
| boss = None | | boss = None | ||
}} | }} | ||
{{About|the | {{About|the Super Famicom release|the Nintendo DS release|Shiren 1 DS:Final Puzzle}} | ||
{{For|the lore page|Shiren:Fay's Final Puzzle}} | {{For|the lore page|Shiren:Fay's Final Puzzle}} | ||
'''Fay's Final Puzzle''' {{JA|フェイの最終問題}} is the ultimate, most difficult bonus {{Shiren1SFC|dungeon}} in {{ | '''Fay's Final Puzzle''' {{JA|フェイの最終問題|}} is the ultimate, most difficult bonus {{Shiren1SFC|dungeon}} in {{Shiren1SFCTitle}}. It is unlocked by completing all 50 {{Shiren1SFC|Fay's Puzzles}}, and the initial goals of {{Shiren1SFC|Scroll Cave}} and {{Shiren1SFC|Kitchen God}}. | ||
==Monsters== | ==Monsters== | ||
==Items== | ==Items== | ||
==Traps== | ==Traps== | ||
==Background Music== | |||
{{Shiren 1 SFC Stub Section}} | |||
==Gallery== | ==Gallery== | ||
<gallery> | <gallery> | ||
Shiren 1 SFC - Fay's Puzzle House Interior.png | Shiren 1 SFC - Fay's Puzzle House Interior.png | Entrance. | ||
Shiren 1 SFC - | Shiren 1 SFC - The Other Side of the World.png | The Other Side of the World. | ||
</gallery> | </gallery> | ||
==In Other Languages== | ==In Other Languages== | ||
{{In Other Languages | {{In Other Languages | ||
| Line 1,149: | Line 64: | ||
==References== | ==References== | ||
<references /> | <references /> | ||
[[Category:Shiren 1 SFC Post-credits Dungeons]] | |||
[[Category:Shiren 1 SFC Post- | |||
[[Category:Shiren 1 SFC Dungeons]] | [[Category:Shiren 1 SFC Dungeons]] | ||
[[Category:Shiren the Wanderer (series) Final Dungeons]] | [[Category:Shiren the Wanderer (series) Final Dungeons]] | ||
Latest revision as of 08:01, 12 July 2025
| Shiren 1 SFC:Final Puzzle フェイの最終問題 | |
|---|---|
 | |
| Information | |
| Entrance Location | Canyon Hamlet |
| Final Goal Floor | 99 |
| Total Floor Count | 99 |
| Bring Items In | No |
| Bring Gitan In | No |
| Bring Adventure Allies In | None |
| Characters | |
| Pre-ID'd Items | |
| Visibility | |
| Shops | |
| Monster Houses | |
| Gitan Vaults | |
| Boss | None |
This Shiren 1 SFC:Final Puzzle page is about the Super Famicom release. For the Nintendo DS release, see Shiren 1 DS:Final Puzzle.
For the lore page, see Shiren:Fay's Final Puzzle.
Fay's Final Puzzle (Japanese: フェイの最終問題) is the ultimate, most difficult bonus dungeon in ![]() Mystery Dungeon 2: Shiren the Wanderer. It is unlocked by completing all 50 Fay's Puzzles, and the initial goals of Scroll Cave and Kitchen God.
Mystery Dungeon 2: Shiren the Wanderer. It is unlocked by completing all 50 Fay's Puzzles, and the initial goals of Scroll Cave and Kitchen God.
Monsters
Items
Traps
Background Music
 | This section is under construction or in need of expansion. You can help the Mystery Dungeon Franchise Wiki by expanding it. |
Gallery
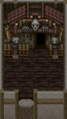
Entrance.
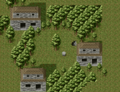
The Other Side of the World.

In Other Languages
| Language | Name | |
|---|---|---|
| English | Fay's Final Puzzle | |
| Japanese | フェイの最終問題 | |
See Also
| Towns and Villages Side locations |
Bamboo Village • Canyon Hamlet • Cryptic Rock Valley • Golden City • Janus Valley • Mountaintop Town • Plains of the Sun • Rainbow's End • Underground Stream Village |
|---|---|
| Dungeons | Fay's Final Puzzle • Kitchen God • Scroll Cave • Table Mountain |