Mystery Dungeon GP>Korra II A Royal |
|
| (185 intermediate revisions by 7 users not shown) |
| Line 1: |
Line 1: |
| {{Stub}} | | {{Shiren 1 SFC Draft}} |
| {| class="wikitable" style="float:right; margin-left: 10px;" | | {{Shiren 1 SFC Dungeon Infobox |
| ! colspan="2" |'''Key Parameters'''[[File:Table Mountain.jpg|center|frameless|alt=Entrance to Table Mountain|Entrance to Table Mountain|link=https://shiren.gamepedia.com/File:Table_Mountain.jpg]]
| | | name = Table Mountain |
| |-
| | | kana = テーブルマウンテン |
| !'''Entrance Location'''
| | | romaji = Tēburu Maunten |
| |'''Canyon Hamlet'''
| | | hepburn = |
| |-
| | | image = Shiren 1 SFC - Pegasus Ridge.png |
| !'''Final Goal Floor'''
| | | description = Story Dungeon |
| |'''30 Fl'''
| | | entrance = {{Shiren1SFC|Canyon Hamlet}} |
| |-
| | | goal floor = The Cave Behind The Waterfall (floor 30) |
| !'''Bring Items In'''
| | | total floors = 30 |
| |'''Yes'''
| | | items = Yes |
| |-
| | | gitan = Yes |
| !'''Pre-ID'd Items'''
| | | allies = 3 |
| |
| | | id = |
| |-
| | | shops = Floor 8 onward and {{Shiren1SFC|town}}s |
| !'''# of Allies'''
| | | monster houses = One room, Great Hall - Floor 8 onward |
| |'''3'''
| | | vaults = |
| |-
| | | characters = Various, allies |
| !'''Shops'''
| | | spawn rate = |
| |'''8 Fl onward and towns'''
| | | turns = |
| |-
| | | boss = {{Shiren1SFC|Tainted Insect}} |
| !'''Monster Houses'''
| | }} |
| |'''One room, Great Hall'''
| | {{About|the Super Famicom release|the Nintendo DS release|Shiren 1 DS:Table Mountain}} |
| |-
| | {{For|the lore page|Shiren:Table Mountain}} |
| !'''NPCs'''
| |
| |'''Various, allies'''
| |
| |-
| |
| !'''Spawn Rate'''
| |
| |
| |
| |-
| |
| !'''Winds of Kron'''
| |
| |
| |
| |-
| |
| !Boss
| |
| |'''Tainted Insect'''
| |
| '''Madremlas, Skull Wraith,'''
| |
| | |
| '''Green Walrus'''
| |
| |} | |
| ==Introduction== | |
| In Mystery Dungeon: Shiren the Wanderer, you have a handful of different dungeons to explore. When you're first starting out, however, you only have access to one dungeon: the infamous Table Mountain (Japanese テーブルマウンテン). Think of Table Mountain as the main game. Once you beat it, you gain access to a lot more bonus content in the form of extra bonus dungeons. In fact, the bonus dungeons make up approximately 80% of the content available in the game!
| |
| | |
| Dungeons in Shiren the Wanderer consist of of randomly generated floors with loot and equipment scattered about. One of the unique features of Table Mountain is that you can go forward or backwards through up to the Cryptic Rock Valley. Past that is the point of no return. In all other dungeons, you may only progress forward through the dungeon, into more dangerous territory. This walkthrough only covers the first dungeon / main game. It is intended for beginner players who don't mind getting spoiled with a lot of secrets. Even experienced players might find a few new tips in here as well. Players of other Mystery Dungeon games are often surprised to find out the main adventure in Shiren is only 30 floors. But you shouldn't underestimate them, you will die many times and often when playing Shiren the Wanderer. The most important thing in Shiren is that you learn something from every death.
| |
| | |
| <small>"Shiren the Wanderer is a short game. You could probably beat it in an hour. But ''you'' probably couldn't."</small>
| |
| ==Dungeon Monsters==
| |
| {| class="wikitable"
| |
| !Sprites
| |
| !Monster
| |
| !English
| |
| !Floors
| |
| !EXP
| |
| |- | |
| ![[File:Mamel.png|center|link=https://shiren.gamepedia.com/Mamel.png]]
| |
| |マムル
| |
| |Mamel
| |
| |1 - 2
| |
| |2
| |
| |-
| |
| ![[File:Baby Tengu.png|center|link=https://shiren.gamepedia.com/Https://shiren.gamepedia.com/Baby_Tengu.png]]
| |
| |小僧天狗
| |
| |Baby Tengu
| |
| |1 - 3
| |
| |3
| |
| |-
| |
| ![[File:Mini Robber.png|center|link=https://shiren.gamepedia.com/Https://shiren.gamepedia.com/File:Mini_Robber.png]]
| |
| |豆山賊
| |
| |Mini Robber
| |
| |1 - 3
| |
| |5
| |
| |-
| |
| ![[File:Bowboy.png|center|link=https://shiren.gamepedia.com/Bowboy.png]]
| |
| |ボウヤー
| |
| |Bowboy
| |
| |3 - 4 | |
| |4
| |
| |-
| |
| ![[File:Ghost Raddish.png|center|link=https://shiren.gamepedia.com/Https://shiren.gamepedia.com/Ghost_Raddish.png]]
| |
| |おばけ大根 | |
| |Ghost Radish
| |
| |3 - 4
| |
| |8
| |
| |- | |
| ![[File:Rice Changer.png|center|link=https://shiren.gamepedia.com/Https://shiren.gamepedia.com/Rice_Changer.png]]
| |
| |妖怪にぎり変化 | |
| |Rice Changer
| |
| |3 - 6
| |
| |10
| |
| |-
| |
| ![[File:Pickpocket.png|center|link=https://shiren.gamepedia.com/Pickpocket.png]]
| |
| |ガマラ
| |
| |Pickpocket
| |
| |3 - 7
| |
| |5
| |
| |- | |
| ![[File:Snaky.png|center|link=https://shiren.gamepedia.com/File:Snaky.png]]
| |
| |ハブーン | |
| |Snaky
| |
| |4 - 6
| |
| |10
| |
| |-
| |
| ![[File:Field Bandit.png|center|link=https://shiren.gamepedia.com/Https://shiren.gamepedia.com/Field_Bandit.png]]
| |
| |畠荒らし | |
| |Field Bandit
| |
| |5 - 6
| |
| |12
| |
| |-
| |
| ![[File:Evil Soldier.png|center|link=https://shiren.gamepedia.com/Https://shiren.gamepedia.com/Evil_Soldier.png]]
| |
| |鬼面武者
| |
| |Evil Soldier
| |
| |5 - 7
| |
| |15
| |
| |-
| |
| ![[File:Dead Soldier.png|center|link=https://shiren.gamepedia.com/Https://shiren.gamepedia.com/Dead_Soldier.png]]
| |
| |ぼうれい武者
| |
| |Dead Soldier
| |
| |5 - 7
| |
| |10
| |
| |-
| |
| ![[File:Egg Thing.png|center|link=https://shiren.gamepedia.com/Https://shiren.gamepedia.com/Egg_Thing.png]]
| |
| |ぴーたん
| |
| |Egg Thing
| |
| |5 - 14
| |
| |7
| |
| |-
| |
| ![[File:Skull Mage.png|center|link=https://shiren.gamepedia.com/Https://shiren.gamepedia.com/Skull_Mage.png]]
| |
| |ガイコツまどう
| |
| |Skull Mage
| |
| |7 - 9
| |
| |15
| |
| |-
| |
| ![[File:Death Reaper.png|center|link=https://shiren.gamepedia.com/Https://shiren.gamepedia.com/Death_Reaper.png]]
| |
| |死の使い
| |
| |Death Reaper
| |
| |7 - 9
| |
| |30
| |
| |-
| |
| ![[File:Baby Tank.png|center|link=https://shiren.gamepedia.com/Https://shiren.gamepedia.com/File:Baby_Tank.png]]
| |
| |コドモ戦車
| |
| |Baby Tank
| |
| |8 - 10
| |
| |40 | |
| |- | |
| ![[File:Piggy.png|center|link=https://shiren.gamepedia.com/Piggy.png]]
| |
| |デブータ
| |
| |Piggy
| |
| |8 - 10
| |
| |23
| |
| |-
| |
| ![[File:Soldier Ant.png|center|link=https://shiren.gamepedia.com/Https://shiren.gamepedia.com/Soldier_Ant.png]]
| |
| |兵隊アリ
| |
| |Soldier Ant
| |
| |8 - 14
| |
| |10 | |
| |-
| |
| ![[File:Thief.png|center|link=https://shiren.gamepedia.com/Thief.png]]
| |
| |ガマグッチ
| |
| |Thief
| |
| |8 - 14
| |
| |20 | |
| |-
| |
| ![[File:Thiefwalrus.png|center|link=https://shiren.gamepedia.com/Thiefwalrus.png]]
| |
| |ぬすっトド
| |
| |Thiefwalrus
| |
| |8 - 14
| |
| |20
| |
| |- | |
| ![[File:Dark Owl.png|center|link=https://shiren.gamepedia.com/Https://shiren.gamepedia.com/Dark_Owl.png]]
| |
| |やみふくろう | |
| |Dark Owl
| |
| |8 - 14
| |
| |15
| |
| |-
| |
| ![[File:Curse Girl.png|center|link=https://shiren.gamepedia.com/Https://shiren.gamepedia.com/Curse_Girl.png]]
| |
| |ノロージョ
| |
| |Curse Girl
| |
| |10 - 12
| |
| |40
| |
| |- | |
| ![[File:Inferno.png|center|link=https://shiren.gamepedia.com/Inferno.png]]
| |
| |火炎入道 | |
| |Inferno
| |
| |10 - 12 | |
| |60
| |
| |-
| |
| ![[File:Pacorepkin.png|center|link=https://shiren.gamepedia.com/Pacorepkin.png]]
| |
| |パコレプキン
| |
| |Pacorepkin
| |
| |10 - 13
| |
| |30
| |
| |-
| |
| ![[File:Fluffy Bunny.png|center|link=https://shiren.gamepedia.com/File:Fluffy_Bunny.png]]
| |
| |いやしウサギ
| |
| |Fluffy Bunny
| |
| |10 - 29
| |
| |30
| |
| |-
| |
| ![[File:Kigny.png|center|link=https://shiren.gamepedia.com/Kigny.png]]
| |
| |キグニ族
| |
| |Kigny
| |
| |11 - 13
| |
| |45
| |
| |-
| |
| ![[File:Popster Tank.png|center|link=https://shiren.gamepedia.com/File:Popster_Tank.png]]
| |
| |オヤジ戦車
| |
| |Popster Tank
| |
| |12 - 14
| |
| |70
| |
| |-
| |
| ![[File:Sabregator.png|center|link=https://shiren.gamepedia.com/File:Sabregator.png]]
| |
| |サーベルゲータ
| |
| |Sabregator
| |
| |15 - 16
| |
| |80
| |
| |-
| |
| ![[File:Purple Slime.png|center|link=https://shiren.gamepedia.com/Https://shiren.gamepedia.com/Purple_Slime.png]]
| |
| |ゲドロ
| |
| |Purple Slime
| |
| |15 - 16
| |
| |90
| |
| |-
| |
| ![[File:Gather.png|center|link=https://shiren.gamepedia.com/Gather.png]]
| |
| |ギャザー
| |
| |Gather
| |
| |15 - 16
| |
| |135
| |
| |-
| |
| ![[File:Leech Worm.png|center|link=https://shiren.gamepedia.com/Https://shiren.gamepedia.com/Leech_Worm.png]]
| |
| |吸引幼虫
| |
| |Leech Worm
| |
| |15 - 16
| |
| |30
| |
| |-
| |
| ![[File:Twisty Hani.png|center|link=https://shiren.gamepedia.com/Https://shiren.gamepedia.com/Twisty_Hani.png]]
| |
| |くねくねハニー
| |
| |Twisty Hani
| |
| |15 - 16
| |
| |40
| |
| |-
| |
| ![[File:Daze Raddish.png|center|link=https://shiren.gamepedia.com/Https://shiren.gamepedia.com/File:Daze_Raddish.png]]
| |
| |めまわし大根
| |
| |Daze Radish
| |
| |15 - 16
| |
| |80
| |
| |-
| |
| ![[File:Curse Sis.png|center|link=https://shiren.gamepedia.com/File:Curse_Sis.png]]
| |
| |ノロージョの姉
| |
| |Curse Sis
| |
| |17 - 19
| |
| |100
| |
| |-
| |
| ![[File:Running Egg.png|center|link=https://shiren.gamepedia.com/Https://shiren.gamepedia.com/Running_Egg.png]]
| |
| |逃げピータン
| |
| |Running Egg
| |
| |17 - 19
| |
| |50
| |
| |-
| |
| ![[File:Minotaur.png|center|link=https://shiren.gamepedia.com/Minotaur.png]]
| |
| |ミノタウロス
| |
| |Minotaur
| |
| |17 - 20
| |
| |300
| |
| |-
| |
| ![[File:Master Hen.png|center|link=https://shiren.gamepedia.com/File:Master_Hen.png]]
| |
| |マスターチキン
| |
| |Master Hen
| |
| |17 - 20
| |
| |400
| |
| |-
| |
| ![[File:Air Devil.png|center|link=https://shiren.gamepedia.com/Https://shiren.gamepedia.com/Air_Devil.png]]
| |
| |エーテルデビル
| |
| |Air Devil
| |
| |17 - 26
| |
| |50
| |
| |-
| |
| ![[File:Greenwalrus.png|center|link=https://shiren.gamepedia.com/File:Greenwalrus.png]]
| |
| |みどりトド
| |
| |Greenwalrus
| |
| |17 - 26
| |
| |50
| |
| |-
| |
| ![[File:Inferno2.png|center|link=https://shiren.gamepedia.com/File:Inferno2.png]]
| |
| |火炎入道2
| |
| |Inferno2
| |
| |19 - 21
| |
| |170
| |
| |-
| |
| ![[File:Flying Egg.png|center|link=https://shiren.gamepedia.com/File:Flying_Egg.png]]
| |
| |飛びぴーたん
| |
| |Flying Egg
| |
| |19 - 25
| |
| |150
| |
| |-
| |
| ![[File:Schubell.png|center|link=https://shiren.gamepedia.com/Schubell.png]]
| |
| |シューベル
| |
| |Schubell
| |
| |21 - 25
| |
| |50
| |
| |-
| |
| ![[File:Menbell.png|center|link=https://shiren.gamepedia.com/Menbell.png]]
| |
| |メンベルス
| |
| |Menbell
| |
| |21 - 25
| |
| |250
| |
| |-
| |
| ![[File:Mecharoid.png|center|link=https://shiren.gamepedia.com/Mecharoid.png]]
| |
| |カラクロイド
| |
| |Mecharoid
| |
| |21 - 23
| |
| |250
| |
| |-
| |
| ![[File:Super Gaze.png|center|link=https://shiren.gamepedia.com/File:Super_Gaze.png]]
| |
| |スーパーゲイズ | |
| |Super Gaze | |
| |21 - 24
| |
| |300
| |
| |-
| |
| ![[File:Chainhead.png|center|link=https://shiren.gamepedia.com/File:Chainhead.png]]
| |
| |チェインヘッド
| |
| |Chainhead
| |
| |21 - 24
| |
| |500
| |
| |-
| |
| ![[File:Haze Hermit.png|center|link=https://shiren.gamepedia.com/File:Haze_Hermit.png]]
| |
| |みの仙人
| |
| |Haze Hermit
| |
| |23 - 25
| |
| |150
| |
| |-
| |
| ![[File:Polygon Jive.png|center|link=https://shiren.gamepedia.com/Https://shiren.gamepedia.com/Polygon_Jive.png]]
| |
| |おどるポリゴン
| |
| |Polygon Jive
| |
| |23 - 25
| |
| |400
| |
| |-
| |
| ![[File:Pacorepkina.png|center|link=https://shiren.gamepedia.com/File:Pacorepkina.png]]
| |
| |パコレプキーナ
| |
| |Pacorepkina
| |
| |23 - 25
| |
| |250
| |
| |-
| |
| ![[File:Metal Armor.png|center|link=https://shiren.gamepedia.com/File:Metal_Armor.png]]
| |
| |クロムアーマー
| |
| |Metal Armor
| |
| |23 - 25
| |
| |350
| |
| |-
| |
| ![[File:Dark Owl.png|center|link=https://shiren.gamepedia.com/Https://shiren.gamepedia.com/Dark_Owl.png]]
| |
| |やみふくろう
| |
| |Dark Owl
| |
| |23 - 25
| |
| |15
| |
| |-
| |
| ![[File:Skull Wraith.png|center|link=https://shiren.gamepedia.com/File:Skull_Wraith.png]]
| |
| |ガイコツまおう
| |
| |Skull Wraith
| |
| |26 - 27
| |
| |400
| |
| |-
| |
| ![[File:Death Angel.png|center|link=https://shiren.gamepedia.com/File:Death_Angel.png]]
| |
| |死神
| |
| |Death Angel
| |
| |26 - 29
| |
| |950
| |
| |-
| |
| ![[File:Dragon.png|center|link=https://shiren.gamepedia.com/File:Dragon.png]]
| |
| |ドラゴン
| |
| |Dragon
| |
| |27 - 29
| |
| |2,500
| |
| |-
| |
| ![[File:Dragon Head.png|center|link=https://shiren.gamepedia.com/Https://shiren.gamepedia.com/Dragon_Head.png]]
| |
| |ドラゴンヘッド
| |
| |Dragon Head
| |
| |27 - 29
| |
| |500
| |
| |-
| |
| ![[File:Madremlas.png|center|link=https://shiren.gamepedia.com/File:Madremlas.png]]
| |
| |マッドレムラス
| |
| |Madremlas
| |
| |27 - 29
| |
| |1,100
| |
| |-
| |
| ![[File:Piggo.png|center|link=https://shiren.gamepedia.com/File:Piggo.png]]
| |
| |デブーチョ
| |
| |Piggo
| |
| |27 - 29
| |
| |200
| |
| |}
| |
|
| |
|
| == Boss Room Strategy ==
| | '''Table Mountain''' {{JA|テーブルマウンテン|Tēburu Maunten|}}, also referred to as '''Kobami Valley''' {{JA|???||}}, is the main story {{Shiren1SFC|dungeon}} in {{Shiren1SFCTitle}}. |
| {| class="wikitable" | | __TOC__ |
| !Sprite
| |
| !Name
| |
| !English
| |
| !Exp.
| |
| |- | |
| ![[File:Tainted Insect.png|link=https://shiren.gamepedia.com/File:Tainted_Insect.png]]
| |
| |魔蝕虫 | |
| |Tainted Insect | |
| |9999 | |
| |- | |
| ![[File:Greenwalrus.png|center|link=https://shiren.gamepedia.com/File:Greenwalrus.png]]
| |
| |みどりトド
| |
| |Greenwalrus
| |
| |50
| |
| |-
| |
| ![[File:Skull Wraith.png|center|link=https://shiren.gamepedia.com/File:Skull_Wraith.png]]
| |
| |ガイコツまおう
| |
| |Skull Wraith
| |
| |400
| |
| |-
| |
| ![[File:Madremlas.png|center|link=https://shiren.gamepedia.com/File:Madremlas.png]]
| |
| |マッドレムラス
| |
| |Madremlas
| |
| |1,100
| |
| |}
| |
|
| |
|
| ==Items== | | {{Clear}} |
| For a list of fan translated names for the Super Famicom in English and Korean, see the [[Shiren 1/Items/Item Lookup|Item DB]] page.
| | ==Sections== |
| {| class="wikitable" | | {| class="wikitable" |
| !JP | | ! Floor(s) |
| !Weapons
| | ! English |
| !JP | | !Japanese |
| !Shields | | !Type |
| !JP | |
| !Armbands
| |
| !JP
| |
| !Projectiles
| |
| !JP
| |
| !Riceballs
| |
| |-
| |
| |こん棒
| |
| |Cudgel
| |
| |重装の盾
| |
| |Armor Ward
| |
| |遠投の腕輪
| |
| |Pitcher's Armband
| |
| |木の矢
| |
| |Wooden Arrows
| |
| |おにぎり
| |
| |Riceball
| |
| |- | | |- |
| |カタナ | | | - |
| |Katana
| | |Canyon Hamlet |
| |地雷ナバリの盾
| |
| |Blast Shield
| |
| |会心の腕輪
| |
| |Critical Armband
| |
| | | |
| | | | | |
| |大きいおにぎり | | | Rest Area |
| |Big Riceball
| |
| |- | | |- |
| |成仏の鎌 | | |1 - 2 |
| |Sickle Slayer | | |Old Cedar Road |
| |青銅甲の盾
| |
| |Bronzeward
| |
| |回復の腕輪
| |
| |Recovery Armband
| |
| | | | | |
| | | | | Shuffle |
| |巨大なおにぎり
| |
| |Giant Riceball
| |
| |- | | |- |
| |つるはし | | | 3 - 4 |
| |Pickaxe | | |Mountain Stream |
| |使い捨ての盾
| |
| |Fragile Shield
| |
| |混乱よけの腕輪
| |
| |Armband of Calm
| |
| | | | | |
| | | | |Shuffle |
| |特製おにぎり
| |
| |Special Riceball
| |
| |- | | |- |
| |どうたぬき | | | - |
| |Mastersword | | |Bamboo Village |
| |鉄甲の盾
| |
| |Iron Shield
| |
| |錆よけの腕輪
| |
| |Rustless Armband
| |
| | | | | |
| | | | |Rest Area |
| |くさったおにぎり
| |
| |Rotten Riceball
| |
| |- | | |- |
| |ドラゴンキラー | | |5 - 6 |
| |Dragonkiller
| | |Pegasus Ridge |
| |トドの盾
| |
| |Walrus Shield
| |
| |しあわせの腕輪
| |
| |Happy Armband
| |
| |
| |
| |
| |
| | | |
| | | | | |
| | |Shuffle |
| |- | | |- |
| |ドレインバスター | | |7 |
| |Drain Buster
| | |Moutaintop Forest |
| |ドラゴンシールド
| |
| |Dragonward
| |
| |透視の腕輪
| |
| |Armband of Sight
| |
| |
| |
| |
| |
| |
| |
| |
| |
| |-
| |
| |長巻
| |
| |Polearm
| |
| |バトルカウンター
| |
| |Spiked Ward
| |
| |値切の腕輪
| |
| |Discount Armband
| |
| |
| |
| |
| |
| |
| |
| |
| |
| |-
| |
| |必中の剣
| |
| |Homing Blade
| |
| |皮甲の盾
| |
| |Hide Shield
| |
| |呪いよけの腕輪
| |
| |Curseless Armband
| |
| |
| |
| |
| |
| | | |
| | | | | |
| | |Shuffle |
| |- | | |- |
| |一ツ目殺し | | | - |
| |Cyclops Killer
| | |Mountaintop Town |
| |見かけだおしの盾
| |
| |Fancy Shield
| |
| |
| |
| |
| |
| |
| |
| |
| |
| | | |
| | | | | |
| | |Rest Area |
| |- | | |- |
| |ミノタウロスの斧 | | |8 - 9 |
| |Minotaur's Axe ※
| | |Old Mine at Mount Nebri |
| |見切りの盾
| |
| |Evasive Shield
| |
| |
| |
| |
| |
| |
| |
| |
| |
| | | |
| | | | | |
| | | Random |
| |- | | |- |
| |妖刀かまいたち | | | - |
| |Razor Wind
| | |Janus Valley |
| |木甲の盾
| |
| |Wood Shield
| |
| |
| |
| |
| |
| |
| |
| |
| |
| | | |
| | | | | |
| | | Rest Area |
| |- | | |- |
| | | 10 - 11 |
| | |Cavern in the Cliff |
| | | | | |
| | | | |Random |
| |やまびこの盾
| |
| |Echo Shield
| |
| |
| |
| |
| |
| |
| |
| |
| |
| |
| |
| |
| |
| |- | | |- |
| !JP
| | | 12 - 14 |
| !Herbs
| | |Cave of the Mountain Spirits |
| !JP
| |
| !Jars
| |
| !JP
| |
| !Staves
| |
| !JP
| |
| !Scroll
| |
| | | |
| | | | | |
| | |Random |
| |- | | |- |
| |胃拡張の種 | | | - |
| |Big Belly Seed
| | |Cryptic Rock Valley |
| |やりすごしの壷
| |
| |Jar of Hiding
| |
| |痛み分けの杖
| |
| |Pain Sharing Staff
| |
| |あかりの巻物
| |
| |Scroll of Light
| |
| | | |
| | | | | |
| | |Rest Area |
| |- | | |- |
| |命の草 | | |15 - 16 |
| |Herb of Life
| | | Waterfall Marsh |
| |保存の壷
| |
| |Jar of Holding
| |
| |一時しのぎの杖
| |
| |Staff of Postpone
| |
| |大部屋の巻物
| |
| |Great Hall Scroll
| |
| | | |
| | | | | |
| | |Shuffle |
| |- | | |- |
| |弟切草 | | |17 - 21 |
| |Restorative Herb
| | |Table Mountain |
| |変化の壷
| |
| |Jar of Change
| |
| |ガイコツまどうの杖
| |
| |Skull Staff ※
| |
| |おはらいの巻物
| |
| |Scroll of Blessing
| |
| | | |
| | | | | |
| | |Random |
| |- | | |- |
| |ちからの草 | | | - |
| |Herb of Strength
| | |Underground Stream Village |
| |合成の壷
| |
| |Melding Jar
| |
| |かなしばりの杖
| |
| |Staff of Paralysis
| |
| |困った時の巻物
| |
| |Scroll of Need
| |
| | | |
| | | | | |
| | |Rest Area |
| |- | | |- |
| |どく消し草 | | |22 - 25 |
| |Antidote Herb
| | |Table Mountain |
| |識別の壷
| |
| |Jar of Identity
| |
| |場所替えの杖
| |
| |Switching Staff
| |
| |混乱の巻物
| |
| |Scroll of Confusion
| |
| | | |
| | | | | |
| | |Random |
| |- | | |- |
| |ドラゴン草 | | |26 |
| |Dragon Herb | | |Ravine of Illusions |
| |背中の壷
| |
| |Chiropractic Jar
| |
| |ふきとばしの杖
| |
| |Knockback Staff
| |
| |ジェノサイドの巻物
| |
| |Scroll of Removal
| |
| |
| |
| | | | | |
| | |Shuffle |
| |- | | |- |
| |復活の草 | | |27 |
| |Herb of Revival
| | |Phantom Trials |
| |倉庫の壷
| |
| |Storehouse Jar
| |
| |不幸の杖
| |
| |Staff of Misfortune
| |
| |識別の巻物
| |
| |Scroll of Identity
| |
| | | |
| | | | | |
| | |Random |
| |- | | |- |
| |無敵草 | | | 28 |
| |Herb of Victory
| | |Dragoncry Trials |
| |トドの壷
| |
| |Walrus Jar
| |
| |ブフーの杖
| |
| |Bufu's Staff
| |
| |真空斬りの巻物
| |
| |Blastwave Scroll
| |
| | | |
| | | | | |
| | |Random |
| |- | | |- |
| |めぐすり草 | | | 29 |
| |Herb of Sight
| | |Final Trial |
| |
| |
| |
| |
| |身がわりの杖
| |
| |Doppelganger Staff
| |
| |吸出しの巻物
| |
| |Extraction Scroll
| |
| | | |
| | | | | |
| | |Random |
| |- | | |- |
| |薬草
| | | - |
| |Medicinal Herb
| | |Plains of the Sun |
| |
| |
| |
| |
| |
| |
| |
| |
| |地の恵みの巻物
| |
| |Earth Bless Scroll
| |
| |
| |
| |
| |
| |- | |
| | | |
| |
| |
| |
| |
| |
| |
| |
| |
| |
| |
| |壷増大の巻物
| |
| |Jar Growth Scroll
| |
| |
| |
| |
| |
| |-
| |
| |
| |
| |
| |
| |
| |
| |
| |
| |
| |
| |
| |
| |天の恵みの巻物
| |
| |Air Bless Scroll
| |
| |
| |
| | | | | |
| | |Rest Area |
| |- | | |- |
| | | - |
| | |Golden City |
| | | | | |
| | | | |Rest Area |
| |
| |
| |
| |
| |
| |
| |
| |
| |白紙の巻物
| |
| |Blank Scroll
| |
| |
| |
| |
| |
| |- | | |- |
| | | - |
| | |Rainbow's End |
| | | | | |
| | | | |Rest Area |
| |
| |
| |
| |
| |
| |
| |
| |
| |バクスイの巻物
| |
| |Scroll of Sleep
| |
| |
| |
| |
| |
| |- | | |- |
| | |30 |
| | |The Cave Behind The Waterfall |
| | | | | |
| | | | |Fixed |
| |
| |
| |
| |
| |
| |
| |
| |
| |パワーアップの巻物
| |
| |Power Up Scroll
| |
| |
| |
| |
| |
| |- | | |- |
| | | - |
| | | Golden Condor |
| | | | | |
| | | | |Fixed |
| |
| |
| |
| |
| |
| |
| |
| |
| |メッキの巻物
| |
| |Plating Scroll
| |
| |
| |
| |
| |
| |} | | |} |
| | |
| | ==Monsters== |
| | ==Boss== |
| | |
| | ==Items== |
| ==Traps== | | ==Traps== |
| {| class="wikitable" | | Triggering a {{Shiren1SFC|Pitfall Trap}} in Table Mountain proper of the dungeon causes the player to go back to the previous {{Shiren1SFC|floor}} as the player is now traveling up the mountain. |
| !
| | |
| !
| | ==Background Music== |
| !
| | {{Shiren 1 SFC Stub Section}} |
| !
| | |
| |- | | ==Gallery== |
| | | | :''For this subject's full gallery, see the {{Gallery|Table Mountain}} gallery.'' |
| | | | |
| | | | <gallery> |
| | | | Shiren 1 SFC - Mountain Stream.png | Mountain Stream<br>Floors: 3 - 4 |
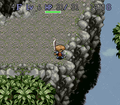
| |- | | Shiren 1 SFC - Pegasus Ridge.png | Pegasus Ridge<br>Floors: 5 - 6 |
| | | | Shiren 1 SFC - Moutaintop Forest.png | Moutaintop Forest<br>Floors: 7 |
| | | | Shiren 1 SFC - Old Mine at Mount Nebri.png | Old Mine at Mount Nebri<br>Floors: 8 - 9 |
| | | | Shiren 1 SFC - Cavern in the Cliff.png | Cavern in the Cliff<br>Floors: 10 - 11 |
| | | | Shiren 1 SFC - Mountain Spirit Cave part 1.png | Mountain Spirit Cave<br>Floors: 12 - 13 |
| |- | | Shiren 1 SFC - Mountain Spirit Cave part 2.png | Mountain Spirit Cave<br>Floors: 14 |
| | | | Shiren 1 SFC - Waterfall Marsh.png | Waterfall Marsh<br>Floors: 15 - 16 |
| | | | Shiren 1 SFC - Table Mountain part 1.png | Table Mountain<br>Floors: 17 - 18 |
| | | | Shiren 1 SFC - Table Mountain part 2.png | Table Mountain<br>Floors: 21 - 22 |
| | | | Shiren 1 SFC - Table Mountain part 3.png | Table Mountain<br>Floors: 23 - 24 |
| |} | | Shiren 1 SFC - Table Mountain part 4.png | Table Mountain<br>Floors: 25 |
| | Shiren 1 SFC - Ravine of Illusions.png | Ravine of Illusions<br>Floors: 26 |
| | Shiren 1 SFC - Phantom Trials.png | Phantom Trials<br>Floors: 27 |
| | Shiren 1 SFC - Dragoncry Trials.png | Dragoncry Trials<br>Floors: 28 |
| | Shiren 1 SFC - The Final Trial.png | The Final Trial<br>Floors: 29 |
| | Shiren 1 SFC - The Cave Behind The Waterfall.png | The Cave Behind The Waterfall<br>Floors: 30 |
| | </gallery> |
| | ==In Other Languages== |
| | {{In Other Languages |
| | | en = Table Mountain |
| | | ja = テーブルマウンテン |
| | | fr = |
| | | fr_ca = |
| | | es = |
| | | es_la = |
| | | de = |
| | | it = |
| | | ko = |
| | | zh = |
| | | td = |
| | | pt = |
| | | pt_br = |
| | }} |
| | |
| | ==See Also== |
| | {{Shiren 1 SFC Locations Navbox}} |
| | |
| | ==References== |
| | <references /> |
|
| |
|
| ==Notes==
| | [[Category:Shiren the Wanderer (series) Story Dungeons]] |
| ==External References==
| | [[Category:Shiren 1 SFC Dungeons]] |
| <ref>https://zapanet.info/shiren/db-sfc-dg-01.html</ref>Dungeon monsters and item tables thanks to [https://zapanet.info/shiren/db-sfc-dg-01.html zapanet.info/shiren]
| |