|
|
| (139 intermediate revisions by 6 users not shown) |
| Line 1: |
Line 1: |
| {{Ambox|type='''Notice''' | | {{Shiren 1 SFC Draft}} |
| All English [[Shiren 1 SFC:Items|item]], [[Shiren 1 SFC:Monsters|monster]], [[Shiren 1 SFC:Traps|trap]] and [[Shiren 1 SFC:Locations|location]] names used on this page are fan-translations. Support has been added due to the popularity and quality of the Shiren 1 SFC English translation.}}
| | {{Shiren 1 SFC Dungeon Infobox |
| {{Infobox Locations (Shiren 1 SFC) | | | name = Table Mountain |
| | name = Table Mountain | | | kana = テーブルマウンテン |
| | kana = テーブルマウンテン | | | romaji = Tēburu Maunten |
| | romaji = | | | hepburn = |
| | hepburn = | | | image = Shiren 1 SFC - Pegasus Ridge.png |
| | image = Table Mountain.jpg | | | description = Story Dungeon |
| | description = Story Dungeon | | | entrance = {{Shiren1SFC|Canyon Hamlet}} |
| | entrance = [[Shiren 1 SFC:Canyon Hamlet|Canyon Hamlet]] | | | goal floor = The Cave Behind The Waterfall (floor 30) |
| | goal floor = Various | | | total floors = 30 |
| | total floors = 30 | | | items = Yes |
| | items = YesYes | | | gitan = Yes |
| | gitan = Yes | | | allies = 3 |
| | allies = 3 | | | id = |
| | id = {{Data needed}} | | | shops = Floor 8 onward and {{Shiren1SFC|town}}s |
| | shops = Floor 8 onward and [[Shiren 1 SFC:Locations|towns]] | | | monster houses = One room, Great Hall - Floor 8 onward |
| | monster houses = One room, Great Hall - Floor 8 onward | | | vaults = |
| | vaults = {{Data needed}} | | | characters = Various, allies |
| | npcs = Various, allies | | | spawn rate = |
| | spawn rate = {{Data needed}} | | | turns = |
| | turns = {{Data needed}} | | | boss = {{Shiren1SFC|Tainted Insect}} |
| | boss = [[Shiren 1 SFC:Mashoku Bug|Mashoku Bug]] | |
| }} | | }} |
| | {{About|the Super Famicom release|the Nintendo DS release|Shiren 1 DS:Table Mountain}} |
| | {{For|the lore page|Shiren:Table Mountain}} |
|
| |
|
| '''Table Mountain''' {{JA|テーブルマウンテン}} the infamous main story dungeon of {{Shiren1SFC|Mystery Dungeon 2: Shiren the Wanderer}}. In Mystery Dungeon: Shiren the Wanderer, you have a handful of different dungeons to explore. When you're first starting out, however, you only have access to one dungeon. Think of Table Mountain as the main game. Once you beat it, you gain access to a lot more bonus content in the form of extra bonus dungeons. In fact, the bonus dungeons make up approximately 90% of the of the games total floor count! | | '''Table Mountain''' {{JA|テーブルマウンテン|Tēburu Maunten|}}, also referred to as '''Kobami Valley''' {{JA|???||}}, is the main story {{Shiren1SFC|dungeon}} in {{Shiren1SFCTitle}}. |
| | __TOC__ |
|
| |
|
| Dungeons in Shiren the Wanderer consist of of randomly generated floors with loot and equipment scattered about. Players of other Mystery Dungeon games are often surprised to find out the main adventure in Shiren is only 30 floors. But you shouldn't underestimate them, you will die many times and often when playing Shiren the Wanderer. The most important thing in Shiren is that you learn something from every death.
| | {{Clear}} |
| | | ==Sections== |
| <small>"Shiren the Wanderer is a short game. You could probably beat it in an hour. But ''you'' probably couldn't."</small>
| | {| class="wikitable" |
| ==Dungeon Monsters== | | ! Floor(s) |
| {| class="shiren1" style="text-align:center; margin:auto" | | ! English |
| ! rowspan="2" |Sprites | |
| ! colspan="2" |[[Shiren 1 SFC:Monsters|Monsters]]
| |
| ! rowspan="2" |Floors
| |
| ! rowspan="2" |[[Experience|EXP]]
| |
| |-
| |
| !English | |
| !Japanese | | !Japanese |
| | !Type |
| |- | | |- |
| ![[File:Shiren 1 SFC Mamel LV1.png]]
| | | - |
| |[[Shiren 1 SFC:Mamul|Mamul]]
| | |Canyon Hamlet |
| |マムル
| |
| |1 - 2
| |
| |2
| |
| |-
| |
| ![[File:Shiren 1 SFC Baby Tengu LV1.png]]
| |
| |[[Shiren 1 SFC:Kid Tengu|Kid Tengu]]
| |
| |小僧天狗
| |
| |1 - 3
| |
| |3
| |
| |-
| |
| ![[File:Shiren 1 SFC Mini Robber LV1.png]]
| |
| |[[Shiren 1 SFC:Bean Bandit|Bean Bandit]]
| |
| |豆山賊
| |
| |1 - 3
| |
| |5
| |
| |-
| |
| ![[File:Shiren 1 SFC Bowboy LV1.png]]
| |
| |[[Shiren 1 SFC:Bowya|Bowya]]
| |
| |ボウヤー
| |
| |3 - 4
| |
| |4
| |
| |-
| |
| ![[File:Shiren 1 SFC Ghost Radish LV1.png]]
| |
| |[[Shiren 1 SFC:Monster Daikon|Monster Daikon]]
| |
| |おばけ大根
| |
| |3 - 4
| |
| |8
| |
| |-
| |
| ![[File:Shiren 1 SFC Rice Changer LV1.png]]
| |
| |[[Shiren 1 SFC:Monster Nigiri Beast|Monster Nigiri Beast]]
| |
| |妖怪にぎり変化
| |
| |3 - 6
| |
| |10
| |
| |-
| |
| ![[File:Shiren 1 SFC Pickpocket LV1.png]]
| |
| |[[Shiren 1 SFC:Gamara|Gamara]]
| |
| |ガマラ
| |
| |3 - 7
| |
| |5
| |
| |-
| |
| ![[File:Shiren 1 SFC Snaky LV1.png]]
| |
| |[[Shiren 1 SFC:Haboon|Haboon]]
| |
| |ハブーン
| |
| |4 - 6
| |
| |10
| |
| |-
| |
| ![[File:Shiren 1 SFC Field Bandit LV1.png]]
| |
| |[[Shiren 1 SFC:Field Raider|Field Raider]]
| |
| |畠荒らし
| |
| |5 - 6
| |
| |12
| |
| |-
| |
| ![[File:Shiren 1 SFC Evil Soldier LV1.png]]
| |
| |[[Shiren 1 SFC:Kimen-Musha|Kimen-Musha]]
| |
| |鬼面武者
| |
| |5 - 7
| |
| |15
| |
| |-
| |
| ![[File:Shiren 1 SFC Dead Soldier LV1.png]]
| |
| |[[Shiren 1 SFC:Ghost Musha|Ghost Musha]]
| |
| |ぼうれい武者
| |
| |5 - 7
| |
| |10
| |
| |-
| |
| ![[File:Shiren 1 SFC Egg Thing LV1.png]]
| |
| |[[Shiren 1 SFC:Peetan|Peetan]]
| |
| |ぴーたん
| |
| |5 - 14
| |
| |7
| |
| |-
| |
| ![[File:Shiren 1 SFC Skull Mage LV1.png]]
| |
| |[[Shiren 1 SFC:Skeleton Mage|Skeleton Mage]]
| |
| |ガイコツまどう
| |
| |7 - 9
| |
| |15
| |
| |-
| |
| ![[File:Shiren 1 SFC Death Reaper LV1.png]]
| |
| |[[Shiren 1 SFC:Minion of Death|Minion of Death]]
| |
| |死の使い
| |
| |7 - 9
| |
| |30
| |
| |-
| |
| ![[File:Shiren 1 SFC Baby Tank LV3.png]]
| |
| |[[Shiren 1 SFC:Kid Tank|Kid Tank]]
| |
| |コドモ戦車
| |
| |8 - 10
| |
| |40
| |
| |-
| |
| ![[File:Shiren 1 SFC Piggy LV1.png]]
| |
| |[[Shiren 1 SFC:Debuta|Debuta]]
| |
| |デブータ
| |
| |8 - 10
| |
| |23
| |
| |-
| |
| ![[File:Shiren 1 SFC Soldier Ant LV1.png]]
| |
| |[[Shiren 1 SFC:Soldier Ant|Soldier Ant]]
| |
| |兵隊アリ
| |
| |8 - 14
| |
| |10
| |
| |-
| |
| ![[File:Shiren 1 SFC Thief LV2.png]]
| |
| |[[Shiren 1 SFC:Gamagucchi|Gamagucchi]]
| |
| |ガマグッチ
| |
| |8 - 14
| |
| |20
| |
| |-
| |
| ![[File:Shiren 1 SFC Thiefwalrus LV1.png]]
| |
| |[[Shiren 1 SFC:Theftodo|Theftodo]]
| |
| |ぬすっトド
| |
| |8 - 14
| |
| |20
| |
| |-
| |
| ![[File:Shiren 1 SFC Dark Owl LV1.png]]
| |
| |[[Shiren 1 SFC:Dark Owl|Dark Owl]]
| |
| |やみふくろう
| |
| |8 - 14
| |
| |15
| |
| |-
| |
| ![[File:Shiren 1 SFC Curse Girl LV1.png]]
| |
| |[[Shiren 1 SFC:Norojo|Norojo]]
| |
| |ノロージョ
| |
| |10 - 12
| |
| |40
| |
| |-
| |
| ![[File:Shiren 1 SFC Inferno LV1.png]]
| |
| |[[Shiren 1 SFC:Flame Priest|Flame Priest]]
| |
| |火炎入道
| |
| |10 - 12
| |
| |60
| |
| |-
| |
| ![[File:Shiren 1 SFC Pacorepkin LV1.png]]
| |
| |[[Shiren 1 SFC:Pumkorepkin|Pumkorepkin]]
| |
| |パコレプキン
| |
| |10 - 13
| |
| |30
| |
| |-
| |
| ![[File:Shiren 1 SFC Fluffy Bunny LV1.png|none]]
| |
| |[[Shiren 1 SFC:Healer Rabbit|Healer Rabbit]]
| |
| |いやしウサギ
| |
| |10 - 29
| |
| |30
| |
| |-
| |
| ![[File:Shiren 1 SFC Kigny LV1.png]]
| |
| |[[Shiren 1 SFC:Kigni Tribe|Kigni Tribe]]
| |
| |キグニ族
| |
| |11 - 13
| |
| |45
| |
| |-
| |
| ![[File:Shiren 1 SFC Popster Tank LV5.png]]
| |
| |[[Shiren 1 SFC:Old Man Tank|Old Man Tank]]
| |
| |オヤジ戦車
| |
| |12 - 14
| |
| |70
| |
| |-
| |
| ![[File:Shiren 1 SFC Sabregator LV2.png]]
| |
| |[[Shiren 1 SFC:Sabre Gator|Sabre Gator]]
| |
| |サーベルゲータ
| |
| |15 - 16
| |
| |80
| |
| |-
| |
| ![[File:Shiren 1 SFC Purple Slime LV2.png]]
| |
| |[[Shiren 1 SFC:Gedoro|Gedoro]]
| |
| |ゲドロ
| |
| |15 - 16
| |
| |90
| |
| |-
| |
| ![[File:Shiren 1 SFC Gather LV1.png]]
| |
| |[[Shiren 1 SFC:Gyazar|Gyazar]]
| |
| |ギャザー
| |
| |15 - 16
| |
| |135
| |
| |-
| |
| ![[File:Shiren 1 SFC Leech Worm LV1.png]]
| |
| |[[Shiren 1 SFC:Absorber Larva|Absorber Larva]]
| |
| |吸引幼虫
| |
| |15 - 16
| |
| |30
| |
| |-
| |
| ![[File:Shiren 1 SFC Twisty Hani LV1.png]]
| |
| |[[Shiren 1 SFC:Wriggling Honey|Wriggling Honey]]
| |
| |くねくねハニー
| |
| |15 - 16
| |
| |40
| |
| |-
| |
| ![[File:Shiren 1 SFC Daze Radish LV2.png]]
| |
| |[[Shiren 1 SFC:Dizzy Daikon|Dizzy Daikon]]
| |
| |めまわし大根
| |
| |15 - 16
| |
| |80
| |
| |-
| |
| ![[File:Shiren 1 SFC Curse Sis LV2.png]]
| |
| |[[Shiren 1 SFC:Norojo's Big Sister|Norojo's Big Sister]]
| |
| |ノロージョの姉
| |
| |17 - 19
| |
| |100
| |
| |-
| |
| ![[File:Shiren 1 SFC Running Egg LV2.png]]
| |
| |[[Shiren 1 SFC:Fleeing Peetan|Fleeing Peetan]]
| |
| |逃げピータン
| |
| |17 - 19
| |
| |50
| |
| |-
| |
| ![[File:Shiren 1 SFC Taur-Minotaur LV1, 2.png|File:Shiren_1_SFC_Taur-Minotaur_LV1,_2.png]]
| |
| |[[Shiren 1 SFC:Minotaur|Minotaur]]
| |
| |ミノタウロス
| |
| |17 - 20
| |
| |300
| |
| |-
| |
| ![[File:Shiren 1 SFC Master Hen LV2.png]]
| |
| |[[Shiren 1 SFC:Master Chicken|Master Chicken]]
| |
| |マスターチキン
| |
| |17 - 20
| |
| |400
| |
| |-
| |
| ![[File:Shiren 1 SFC Air Devil LV1.png]]
| |
| |[[Shiren 1 SFC:Ether Devil|Ether Devil]]
| |
| |エーテルデビル
| |
| |17 - 26
| |
| |50
| |
| |-
| |
| ![[File:Shiren 1 SFC Greenwalrus LV2.png]]
| |
| |[[Shiren 1 SFC:Green Todo|Green Todo]]
| |
| |みどりトド
| |
| |17 - 26
| |
| |50
| |
| |-
| |
| ![[File:Shiren 1 SFC Inferno2 LV2.png]]
| |
| |[[Shiren 1 SFC:Flame Priest 2|Flame Priest 2]]
| |
| |火炎入道2
| |
| |19 - 21
| |
| |170
| |
| |-
| |
| ![[File:Shiren 1 SFC Flying Egg LV3.png]]
| |
| |[[Shiren 1 SFC:Flying Peetan|Flying Peetan]]
| |
| |飛びぴーたん
| |
| |19 - 25
| |
| |150
| |
| |-
| |
| ![[File:Shiren 1 SFC Schubell LV1.png]]
| |
| |[[Shiren 1 SFC:Shoebell|Shoebell]]
| |
| |シューベル
| |
| |21 - 25
| |
| |50
| |
| |-
| |
| ![[File:Shiren 1 SFC Menbell LV2.png]]
| |
| |[[Shiren 1 SFC:Menbells|Menbells]]
| |
| |メンベルス
| |
| |21 - 25
| |
| |250
| |
| |-
| |
| ![[File:Shiren 1 SFC Mecharoid LV1.png]]
| |
| |[[Shiren 1 SFC:Karakuroid|Karakuroid]]
| |
| |カラクロイド
| |
| |21 - 23
| |
| |250
| |
| |-
| |
| ![[File:Shiren 1 SFC Super Gaze LV2.png]]
| |
| |[[Shiren 1 SFC:Super Gaze|Super Gaze]]
| |
| |スーパーゲイズ
| |
| |21 - 24
| |
| |300
| |
| |-
| |
| ![[File:Shiren 1 SFC Chainhead LV2.png]]
| |
| |[[Shiren 1 SFC:Chain-Head|Chain-Head]]
| |
| |チェインヘッド
| |
| |21 - 24
| |
| |500
| |
| |-
| |
| ![[File:Shiren 1 SFC Haze Hermit LV2.png]]
| |
| |[[Shiren 1 SFC:Fog Hermit|Fog Hermit]]
| |
| |みの仙人
| |
| |23 - 25
| |
| |150
| |
| |-
| |
| ![[File:Shiren 1 SFC Polygon Jive LV2.png]]
| |
| |[[Shiren 1 SFC:Dancing Polygon|Dancing Polygon]]
| |
| |おどるポリゴン
| |
| |23 - 25
| |
| |400
| |
| |-
| |
| ![[File:Shiren 1 SFC Pacorepkina LV2.png]]
| |
| |[[Shiren 1 SFC:Pumkorepkin|Pumkorepkin]]
| |
| |パコレプキーナ
| |
| |23 - 25
| |
| |250
| |
| |-
| |
| ![[File:Shiren 1 SFC Metal Armor LV2.png]]
| |
| |[[Shiren 1 SFC:Chrome Armor|Chrome Armor]]
| |
| |クロムアーマー
| |
| |23 - 25
| |
| |350
| |
| |-
| |
| ![[File:Shiren 1 SFC Dark Owl LV1.png]]
| |
| |[[Shiren 1 SFC:Dark Owl|Dark Owl]]
| |
| |やみふくろう
| |
| |23 - 25
| |
| |15
| |
| |-
| |
| ![[File:Shiren 1 SFC Skull Wraith LV3.png]]
| |
| |[[Shiren 1 SFC:Skeleton Archmage|Skeleton Archmage]]
| |
| |ガイコツまおう
| |
| |26 - 27
| |
| |400
| |
| |-
| |
| ![[File:Shiren 1 SFC Death Angel LV3.png]]
| |
| |[[Shiren 1 SFC:Death|Death]]
| |
| |死神
| |
| |26 - 29
| |
| |950
| |
| |-
| |
| ![[File:Shiren 1 SFC Dragon LV1.png]]
| |
| |[[Shiren 1 SFC:Dragon|Dragon]]
| |
| |ドラゴン
| |
| |27 - 29
| |
| |2,500
| |
| |-
| |
| ![[File:Shiren 1 SFC Dragon Head LV2.png]]
| |
| |[[Shiren 1 SFC:Dragon Head|Dragon Head]]
| |
| |ドラゴンヘッド
| |
| |27 - 29
| |
| |500
| |
| |-
| |
| ![[File:Shiren 1 SFC Madremlas LV2.png]]
| |
| |[[Shiren 1 SFC:Madremlas|Madremlas]]
| |
| |マッドレムラス
| |
| |27 - 29
| |
| |1,100
| |
| |-
| |
| ![[File:Shiren 1 SFC Piggo LV2.png]]
| |
| |[[Shiren 1 SFC:Debucho|Debucho]]
| |
| |デブーチョ
| |
| |27 - 29
| |
| |200
| |
| |}
| |
| | |
| == Boss Room Strategy ==
| |
| {| class="shiren1" style="text-align:center; margin:auto"
| |
| ! rowspan="2" |Sprite
| |
| ! colspan="2" |[[Shiren 1 SFC:Special Enemies|Boss]]
| |
| ! rowspan="2" |[[Experience|Exp.]]
| |
| |-
| |
| !English
| |
| !Japanese
| |
| |-
| |
| ![[File:Shiren 1 SFC Tainted Insect Sprite.gif]]
| |
| |[[Shiren 1 SFC:Mashoku Bug|Mashoku Bug]]
| |
| |魔蝕虫
| |
| |9,999
| |
| |-
| |
| ![[File:Shiren 1 SFC Greenwalrus LV2.png]]
| |
| |[[Shiren 1 SFC:Green Todo|Green Todo]]
| |
| |みどりトド
| |
| |50
| |
| |-
| |
| ![[File:Shiren 1 SFC Skull Wraith LV3.png]]
| |
| |[[Shiren 1 SFC:Skeleton Archmage|Skeleton Archmage]]
| |
| |ガイコツまおう
| |
| |400
| |
| |- | |
| ![[File:Shiren 1 SFC Madremlas LV2.png]]
| |
| |[[Shiren 1 SFC:Madremlas|Madremlas]]
| |
| |マッドレムラス
| |
| |1,100
| |
| |}
| |
| | |
| ==Items==
| |
| For a list of fan translated names for the Super Famicom in English, Korean, Spanish and Chinese, see the {{Shiren1SFC|Rosetta Stone}} page.
| |
| {| class="shiren1" style="text-align:center; margin:auto"
| |
| ! colspan="2" |[[File:Shiren 1 SFC Item Icons - Weapon.gif]]<br>[[Shiren 1 SFC:Weapons|Weapons]]
| |
| ! colspan="2" |[[File:Shiren 1 SFC Item Icons - Shield.gif]]<br>[[Shiren 1 SFC:Shields|Shields]]
| |
| ! colspan="2" |[[File:Shiren 1 SFC Item Icons - Armband.gif]]<br>[[Shiren 1 SFC:Bracers|Bracers]]
| |
| ! colspan="2" |[[File:Shiren 1 SFC Item Icons - Arrow.gif]]<br>[[Shiren 1 SFC:Projectiles|Projectiles]]
| |
| ! colspan="2" |[[File:Shiren 1 SFC Item Icons - Riceball.gif]]<br>[[Shiren 1 SFC:Riceballs|Riceballs]]
| |
| |-
| |
| !English
| |
| !Japanese
| |
| !English
| |
| !Japanese
| |
| !English
| |
| !Japanese
| |
| !English
| |
| !Japanese
| |
| !English
| |
| !Japanese
| |
| |-
| |
| |[[Shiren 1 SFC:Club|Club]]
| |
| |こん棒
| |
| |[[Shiren 1 SFC:Heavy Shield|Heavy Shield]]
| |
| |重装の盾
| |
| |[[Shiren 1 SFC:Penetration Bracer|Penetration Bracer]]
| |
| |遠投の腕輪
| |
| |[[Shiren 1 SFC:Wood Arrow|Wood Arrow]]
| |
| |木の矢
| |
| |[[Shiren 1 SFC:Rice Ball|Rice Ball]]
| |
| |おにぎり
| |
| |-
| |
| |[[Shiren 1 SFC:Katana|Katana]]
| |
| |カタナ
| |
| |[[Shiren 1 SFC:Mine Nabari Shield|Mine Nabari Shield]]
| |
| |地雷ナバリの盾
| |
| |[[Shiren 1 SFC:Critical Bracer|Critical Bracer]]
| |
| |会心の腕輪 | |
| | | | | |
| | | | | Rest Area |
| |[[Shiren 1 SFC:Big Rice Ball|Big Rice Ball]]
| |
| |大きいおにぎり
| |
| |- | | |- |
| |[[Shiren 1 SFC:Exorcist Sicle|Exorcist Sicle]] | | |1 - 2 |
| |成仏の鎌
| | |Old Cedar Road |
| |[[Shiren 1 SFC:Bronze Shield|Bronze Shield]]
| |
| |青銅甲の盾
| |
| |[[Shiren 1 SFC:Healing Bracer|Healing Bracer]]
| |
| |回復の腕輪
| |
| | | |
| | | | | |
| |[[Shiren 1 SFC:Huge Rice Ball|Huge Rice Ball]] | | | Shuffle |
| |巨大なおにぎり
| |
| |- | | |- |
| |[[Shiren 1 SFC:Pickaxe|Pickaxe]] | | | 3 - 4 |
| |つるはし
| | |Mountain Stream |
| |[[Shiren 1 SFC:Disposable Shield|Disposable Shield]]
| |
| |使い捨ての盾
| |
| |[[Shiren 1 SFC:Clear Mind Bracer|Clear Mind Bracer]]
| |
| |混乱よけの腕輪
| |
| | | |
| | | | | |
| |[[Shiren 1 SFC:Special Rice Ball|Special Rice Ball]] | | |Shuffle |
| |特製おにぎり
| |
| |- | | |- |
| |[[Shiren 1 SFC:Dotanuki|Dotanuki]] | | | - |
| |どうたぬき
| | |Bamboo Village |
| |[[Shiren 1 SFC:Iron Shield|Iron Shield]]
| |
| |鉄甲の盾
| |
| |[[Shiren 1 SFC:Rustproof Bracer|Rustproof Bracer]]
| |
| |錆よけの腕輪
| |
| | | |
| | | | | |
| |[[Shiren 1 SFC:Rotten Rice Ball|Rotten Rice Ball]] | | |Rest Area |
| |くさったおにぎり
| |
| |- | | |- |
| |[[Shiren 1 SFC:Dragon Killer|Dragon Killer]] | | |5 - 6 |
| |ドラゴンキラー
| | |Pegasus Ridge |
| |[[Shiren 1 SFC:Todo Shield|Todo Shield]]
| |
| |トドの盾
| |
| |[[Shiren 1 SFC:Happy Bracer|Happy Bracer]]
| |
| |しあわせの腕輪
| |
| |
| |
| |
| |
| | | |
| | | | | |
| | |Shuffle |
| |- | | |- |
| |[[Shiren 1 SFC:Drain Buster|Drain Buster]] | | |7 |
| |ドレインバスター
| | |Moutaintop Forest |
| |[[Shiren 1 SFC:Dragon Shield|Dragon Shield]]
| |
| |ドラゴンシールド
| |
| |[[Shiren 1 SFC:Far-sight Bracer|Far-sight Bracer]]
| |
| |透視の腕輪
| |
| |
| |
| |
| |
| | | |
| | | | | |
| | |Shuffle |
| |- | | |- |
| |[[Shiren 1 SFC:Nagamaki|Nagamaki]] | | | - |
| |長巻
| | |Mountaintop Town |
| |[[Shiren 1 SFC:Battle Counter|Battle Counter]]
| |
| |バトルカウンター
| |
| |[[Shiren 1 SFC:Bargain Bracer|Bargain Bracer]]
| |
| |値切の腕輪
| |
| |
| |
| |
| |
| | | |
| | | | | |
| | |Rest Area |
| |- | | |- |
| |[[Shiren 1 SFC:Accuracy Sword|Accuracy Sword]] | | |8 - 9 |
| |必中の剣
| | |Old Mine at Mount Nebri |
| |[[Shiren 1 SFC:Leather Shield|Leather Shield]]
| |
| |皮甲の盾
| |
| |[[Shiren 1 SFC:Blessing Bracer|Blessing Bracer]]
| |
| |呪いよけの腕輪
| |
| |
| |
| |
| |
| | | |
| | | | | |
| | | Random |
| |- | | |- |
| |[[Shiren 1 SFC:One-eye Killer|One-eye Killer]] | | | - |
| |一ツ目殺し
| | |Janus Valley |
| |[[Shiren 1 SFC:Gilded Shield|Gilded Shield]]
| |
| |見かけだおしの盾
| |
| |
| |
| |
| |
| |
| |
| |
| |
| | | |
| | | | | |
| | | Rest Area |
| |- | | |- |
| |[[Shiren 1 SFC:Minotaur Axe|Minotaur Axe]] (※) | | | 10 - 11 |
| |ミノタウロスの斧
| | |Cavern in the Cliff |
| |[[Shiren 1 SFC:Reflex Shield|Reflex Shield]]
| |
| |見切りの盾
| |
| |
| |
| |
| |
| |
| |
| |
| |
| | | |
| | | | | |
| | |Random |
| |- | | |- |
| |[[Shiren 1 SFC:Yoto Kamaitachi|Yoto Kamaitachi]] | | | 12 - 14 |
| |妖刀かまいたち
| | |Cave of the Mountain Spirits |
| |[[Shiren 1 SFC:Wooden Shield|Wooden Shield]]
| |
| |木甲の盾
| |
| |
| |
| |
| |
| |
| |
| |
| |
| | | |
| | | | | |
| | |Random |
| |- | | |- |
| | | - |
| | |Cryptic Rock Valley |
| | | | | |
| | | | |Rest Area |
| |[[Shiren 1 SFC:Echo Shield|Echo Shield]]
| |
| |やまびこの盾
| |
| |
| |
| |
| |
| |
| |
| |
| |
| |
| |
| |
| |
| |- | | |- |
| ! colspan="2" |[[File:Shiren 1 SFC Item Icons - Herb.gif]]<br>[[Shiren 1 SFC:Herbs|Herbs]]
| | |15 - 16 |
| ! colspan="2" |[[File:Shiren 1 SFC Item Icons - Jar.gif]]<br>[[Shiren 1 SFC:Pots|Pots]]
| | | Waterfall Marsh |
| ! colspan="2" |[[File:Shiren 1 SFC Item Icons - Staff.gif]]<br>[[Shiren 1 SFC:Staves|Staves]]
| |
| ! colspan="2" |[[File:Shiren 1 SFC Item Icon - Scroll.gif]]<br>[[Shiren 1 SFC:Scrolls|Scrolls]]
| |
| ! colspan="2" |[[File:Shiren 1 DS Misc Sprites - Found Shop.png]]<br>[[Shiren 1 SFC:Shops|Shop]]
| |
| |-
| |
| !English
| |
| !Japanese
| |
| !English
| |
| !Japanese
| |
| !English
| |
| !Japanese
| |
| !English
| |
| !Japanese
| |
| !English
| |
| !Japanese
| |
| |-
| |
| |[[Shiren 1 SFC:Expansion Seed|Expansion Seed]]
| |
| |胃拡張の種
| |
| |[[Shiren 1 SFC:Hiding Pot|Hiding Pot]]
| |
| |やりすごしの壷
| |
| |[[Shiren 1 SFC:Paindividing Staff|Paindividing Staff]]
| |
| |痛み分けの杖
| |
| |[[Shiren 1 SFC:Light Scroll|Light Scroll]]
| |
| |あかりの巻物
| |
| | | |
| | | | | |
| | |Shuffle |
| |- | | |- |
| |[[Shiren 1 SFC:Life Herb|Life Herb]] | | |17 - 21 |
| |命の草
| | |Table Mountain |
| |[[Shiren 1 SFC:Holding Pot|Holding Pot]]
| |
| |保存の壷
| |
| |[[Shiren 1 SFC:Buy-Time Staff|Buy-Time Staff]]
| |
| |一時しのぎの杖
| |
| |[[Shiren 1 SFC:Bigroom Scroll|Bigroom Scroll]]
| |
| |大部屋の巻物
| |
| | | |
| | | | | |
| | |Random |
| |- | | |- |
| |[[Shiren 1 SFC:Otogiri-So|Otogiri-So]] | | | - |
| |弟切草
| | |Underground Stream Village |
| |[[Shiren 1 SFC:Transform Pot|Transform Pot]]
| |
| |変化の壷
| |
| |[[Shiren 1 SFC:Skeleton Mage Staff|Skeleton Mage Staff]] (※)
| |
| |ガイコツまどうの杖
| |
| |[[Shiren 1 SFC:Purify Scroll|Purify Scroll]]
| |
| |おはらいの巻物
| |
| | | |
| | | | | |
| | |Rest Area |
| |- | | |- |
| |[[Shiren 1 SFC:Power Herb|Power Herb]] | | |22 - 25 |
| |ちからの草
| | |Table Mountain |
| |[[Shiren 1 SFC:Fusion Pot|Fusion Pot]]
| |
| |合成の壷
| |
| |[[Shiren 1 SFC:Paralysis Staff|Paralysis Staff]]
| |
| |かなしばりの杖
| |
| |[[Shiren 1 SFC:Crisis Scroll|Crisis Scroll]]
| |
| |困った時の巻物
| |
| | | |
| | | | | |
| | |Random |
| |- | | |- |
| |[[Shiren 1 SFC:Antidote Herb|Antidote Herb]] | | |26 |
| |どく消し草
| | |Ravine of Illusions |
| |[[Shiren 1 SFC:ID Pot|ID Pot]]
| |
| |識別の壷
| |
| |[[Shiren 1 SFC:Swap Staff|Swap Staff]]
| |
| |場所替えの杖
| |
| |[[Shiren 1 SFC:Confuse Scroll|Confuse Scroll]]
| |
| |混乱の巻物
| |
| | | |
| | | | | |
| | |Shuffle |
| |- | | |- |
| |[[Shiren 1 SFC:Dragon Herb|Dragon Herb]] | | |27 |
| |ドラゴン草
| | |Phantom Trials |
| |[[Shiren 1 SFC:Back Pot|Back Pot]]
| |
| |背中の壷
| |
| |[[Shiren 1 SFC:Blowback Staff|Blowback Staff]]
| |
| |ふきとばしの杖
| |
| |[[Shiren 1 SFC:Genocide Scroll|Genocide Scroll]]
| |
| |ジェノサイドの巻物
| |
| | | |
| | | | | |
| | |Random |
| |- | | |- |
| |[[Shiren 1 SFC:Revival Herb|Revival Herb]] | | | 28 |
| |復活の草
| | |Dragoncry Trials |
| |[[Shiren 1 SFC:Storage Pot|Storage Pot]]
| |
| |倉庫の壷
| |
| |[[Shiren 1 SFC:Unlucky Staff|Unlucky Staff]]
| |
| |不幸の杖
| |
| |[[Shiren 1 SFC:Identify Scroll|Identify Scroll]]
| |
| |識別の巻物
| |
| | | |
| | | | | |
| | |Random |
| |- | | |- |
| |[[Shiren 1 SFC:Invincible Herb|Invincible Herb]] | | | 29 |
| |無敵草
| | |Final Trial |
| |[[Shiren 1 SFC:Todo Pot|Todo Pot]]
| |
| |トドの壷
| |
| |[[Shiren 1 SFC:Bufoo's Staff|Bufoo's Staff]]
| |
| |ブフーの杖
| |
| |[[Shiren 1 SFC:Airslash Scroll|Airslash Scroll]]
| |
| |真空斬りの巻物
| |
| | | |
| | | | | |
| | |Random |
| |- | | |- |
| |[[Shiren 1 SFC:Vision Herb|Vision Herb]] | | | - |
| |めぐすり草
| | |Plains of the Sun |
| |
| |
| |
| |
| |[[Shiren 1 SFC:Decoy Staff|Decoy Staff]]
| |
| |身がわりの杖
| |
| |[[Shiren 1 SFC:Withdraw Scroll|Withdraw Scroll]]
| |
| |吸出しの巻物
| |
| | | |
| | | | | |
| | |Rest Area |
| |- | | |- |
| |[[Shiren 1 SFC:Medical Herb|Medical Herb]] | | | - |
| |薬草
| | |Golden City |
| |
| |
| |
| |
| |
| |
| |
| |
| |[[Shiren 1 SFC:Earth Scroll|Earth Scroll]]
| |
| |地の恵みの巻物
| |
| | | |
| | | | | |
| | |Rest Area |
| |- | | |- |
| | | - |
| | |Rainbow's End |
| | | | | |
| | | | |Rest Area |
| |
| |
| |
| |
| |
| |
| |
| |
| |[[Shiren 1 SFC:Bigpot Scroll|Bigpot Scroll]]
| |
| |壷増大の巻物
| |
| |
| |
| |
| |
| |- | | |- |
| | |30 |
| | |The Cave Behind The Waterfall |
| | | | | |
| | | | |Fixed |
| |
| |
| |
| |
| |
| |
| |
| |
| |[[Shiren 1 SFC:Heaven Scroll|Heaven Scroll]]
| |
| |天の恵みの巻物
| |
| |
| |
| |
| |
| |-
| |
| |
| |
| |
| |
| |
| |
| |
| |
| |
| |
| |
| |
| |[[Shiren 1 SFC:Blank Scroll|Blank Scroll]]
| |
| |白紙の巻物
| |
| |
| |
| |
| |
| |-
| |
| |
| |
| |
| |
| |
| |
| |
| |
| |
| |
| |
| |
| |[[Shiren 1 SFC:Slumber Scroll|Slumber Scroll]]
| |
| |バクスイの巻物
| |
| |
| |
| |
| |
| |-
| |
| |
| |
| |
| |
| |
| |
| |
| |
| |
| |
| |
| |
| |[[Shiren 1 SFC:Powerup Scroll|Powerup Scroll]]
| |
| |パワーアップの巻物
| |
| |
| |
| |
| |
| |- | | |- |
| | | - |
| | | Golden Condor |
| | | | | |
| | | | |Fixed |
| |
| |
| |
| |
| |
| |
| |
| |
| |[[Shiren 1 SFC:Chrome Scroll|Chrome Scroll]]
| |
| |メッキの巻物
| |
| |
| |
| |
| |
| |} | | |} |
| (※) Monster Drop
| |
|
| |
|
| | ==Monsters== |
| | ==Boss== |
| | |
| | ==Items== |
| ==Traps== | | ==Traps== |
| {{Stub Section}} | | Triggering a {{Shiren1SFC|Pitfall Trap}} in Table Mountain proper of the dungeon causes the player to go back to the previous {{Shiren1SFC|floor}} as the player is now traveling up the mountain. |
| {| class="shiren1" style="text-align:center; margin:auto" | | |
| ! rowspan="2" |Sprite
| | ==Background Music== |
| ! colspan="2" |[[Shiren 1 SFC:Traps|Traps]]
| | {{Shiren 1 SFC Stub Section}} |
| ! rowspan="2" |Floor
| | |
| |- | | ==Gallery== |
| !English
| | :''For this subject's full gallery, see the {{Gallery|Table Mountain}} gallery.'' |
| !Japanese
| | |
| |- | | <gallery> |
| !
| | Shiren 1 SFC - Mountain Stream.png | Mountain Stream<br>Floors: 3 - 4 |
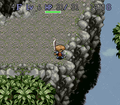
| | | | Shiren 1 SFC - Pegasus Ridge.png | Pegasus Ridge<br>Floors: 5 - 6 |
| | | | Shiren 1 SFC - Moutaintop Forest.png | Moutaintop Forest<br>Floors: 7 |
| | | | Shiren 1 SFC - Old Mine at Mount Nebri.png | Old Mine at Mount Nebri<br>Floors: 8 - 9 |
| |- | | Shiren 1 SFC - Cavern in the Cliff.png | Cavern in the Cliff<br>Floors: 10 - 11 |
| !
| | Shiren 1 SFC - Mountain Spirit Cave part 1.png | Mountain Spirit Cave<br>Floors: 12 - 13 |
| | | | Shiren 1 SFC - Mountain Spirit Cave part 2.png | Mountain Spirit Cave<br>Floors: 14 |
| | | | Shiren 1 SFC - Waterfall Marsh.png | Waterfall Marsh<br>Floors: 15 - 16 |
| | | | Shiren 1 SFC - Table Mountain part 1.png | Table Mountain<br>Floors: 17 - 18 |
| |- | | Shiren 1 SFC - Table Mountain part 2.png | Table Mountain<br>Floors: 21 - 22 |
| !
| | Shiren 1 SFC - Table Mountain part 3.png | Table Mountain<br>Floors: 23 - 24 |
| | | | Shiren 1 SFC - Table Mountain part 4.png | Table Mountain<br>Floors: 25 |
| | | | Shiren 1 SFC - Ravine of Illusions.png | Ravine of Illusions<br>Floors: 26 |
| | | | Shiren 1 SFC - Phantom Trials.png | Phantom Trials<br>Floors: 27 |
| |} | | Shiren 1 SFC - Dragoncry Trials.png | Dragoncry Trials<br>Floors: 28 |
| | Shiren 1 SFC - The Final Trial.png | The Final Trial<br>Floors: 29 |
| | Shiren 1 SFC - The Cave Behind The Waterfall.png | The Cave Behind The Waterfall<br>Floors: 30 |
| | </gallery> |
| | ==In Other Languages== |
| | {{In Other Languages |
| | | en = Table Mountain |
| | | ja = テーブルマウンテン |
| | | fr = |
| | | fr_ca = |
| | | es = |
| | | es_la = |
| | | de = |
| | | it = |
| | | ko = |
| | | zh = |
| | | td = |
| | | pt = |
| | | pt_br = |
| | }} |
| | |
| | ==See Also== |
| | {{Shiren 1 SFC Locations Navbox}} |
|
| |
|
| ==External Sources== | | ==References== |
| * <ref>https://zapanet.info/shiren/db-sfc-dg-01.html</ref> Dungeon monsters and item tables thanks to zapanet.info/shiren
| | <references /> |
|
| |
|
| [[Category:Shiren 1 Locations]] | | [[Category:Shiren the Wanderer (series) Story Dungeons]] |
| [[Category:Story Dungeons]]
| | [[Category:Shiren 1 SFC Dungeons]] |
| [[Category:Dungeons needing traps]]
| |
| [[Category:Shiren 1 SFC Locations]] | |
| [[Category:Dungeons]]
| |